久しぶりに Raspbianをインストールしてみる / VNC が改善!
色々変わったと思うので、備忘録を作り直します。
Raspberry pi 3 model b に、Raspbian を入れます。
VNCがちゃんと起動しました。
OSの準備まで
OS img の取得
Download Raspbian for Raspberry Pi
2017-12-06 の時点で RASPBIAN STRETCH WITH DESKTOP Version:November 2017 でした。
ダウンロードした zip を展開して、img ファイルを取得します。
micro sd カードのフォーマット
SD Memory Card Formatter でフォーマットします。
SDメモリカードフォーマッター for Windows Download - SD Association
インストール後のプログラム名は、 SD Card Fromatter です。
Start Menu から起動する場合は注意です。
img を焼く
Win32DiskImager で焼きます。
Win32 Disk Imager download | SourceForge.net
OS起動後
ファームウェアのアップデート
$ sudo rpi-update
$ reboot
パッケージリストの更新、 インストールされてるパッケージの更新
$ sudo apt-get update
$ sudo apt-get upgrade
raspi-config からの設定
ログイン後、必要に応じて startx する。
SSH ON
$ sudo systemctl enable ssh
$ sudo systemctl start ssh
root パスワード設定と、新規ユーザー作成、グループ所属、sudoers 設定
危ないので、root のパスワードも変更します。
$ sudo su -
# passwd
また、username が判明しているだけでも嫌なので、pi は使わずに、新規に user を作ります。
その際、各種グループに所属させておかないと、音がならなかったりします。(昔はそうだった)
なお、useradd で作成すると、ログインシェルの設定ファイルなどが作成されないので、adduser が良さそうです。
$ sudo adduser USERNAME

$ groups pi
pi : pi adm dialout cdrom sudo audio video plugdev games users input netdev spi i2c gpio
$ sudo usermod -G pi,adm,dialout,cdrom,sudo,audio,video,plugdev,games,users,input,netdev,spi,i2c,gpio USERNAME

$ sudo visudo
(末尾に以下を追記)
USERNAME  ALL=NOPASSWD: ALL
IP を固定する
/etc/dhcpcd.conf を編集し、下記を追記します。
interface eth0
static ip_address=192.168.100.88/24
static routers=192.168.100.1
static domain_name_servers=192.168.100.1
音の設定
Control の確認
$ amixer controls
numid=3,iface=MIXER,name='PCM Playback Route'
numid=2,iface=MIXER,name='PCM Playback Switch'
numid=1,iface=MIXER,name='PCM Playback Volume'
numid=5,iface=PCM,name='IEC958 Playback Con Mask'
numid=4,iface=PCM,name='IEC958 Playback Default'
アナログに設定
$ amixer cset numid=3 1
usb で鳴らしてみる
デバイスの確認をして、aplay, mpeg321 で試します。
omxplayer は、usbに音をだすことはできなかったはず。
$ lsusb
Bus 001 Device 004: ID 046d:c52b Logitech, Inc. Unifying Receiver
Bus 001 Device 005: ID 041e:323d Creative Technology, Ltd
Bus 001 Device 003: ID 0424:ec00 Standard Microsystems Corp. SMSC9512/9514 Fast Ethernet Adapter
Bus 001 Device 002: ID 0424:9514 Standard Microsystems Corp. SMC9514 Hub
Bus 001 Device 001: ID 1d6b:0002 Linux Foundation 2.0 root hub

$ aplay -D plughw:1,0 /usr/share/scratch/Media/Sounds/Vocals/Singer1.wav

$ sudo apt-get install mpg321
$ mpg321 -o alsa -a hw:1 some.mp3

$ sudo apt-get install mplayer
$ mplayer -ao alsa:device=plughw=1.0 example.mp3
omxplayer
$ omxplayer **.mp4
VNC の設定
raspi-config
- Interface options
- P3 VNC
から、有効にする。
それから、デスクトップの右上のVNCアイコンから、
VNC Options ->Troubleshooting -> Enable experimental direct capture mode
そして、再起動。
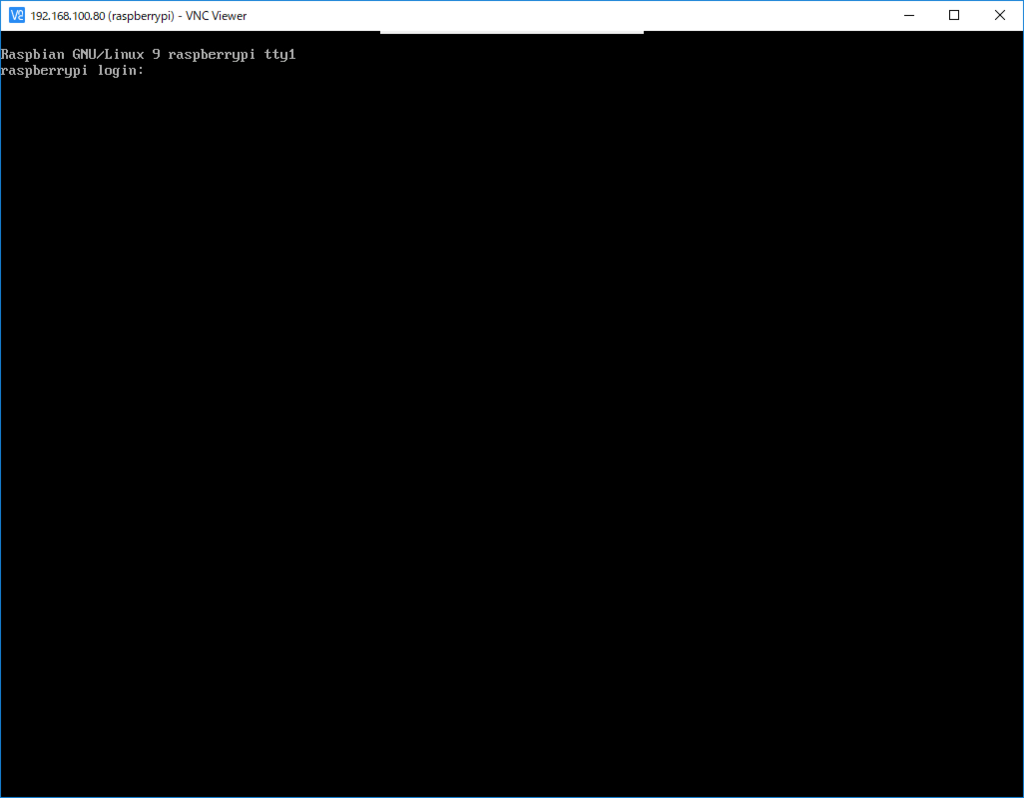
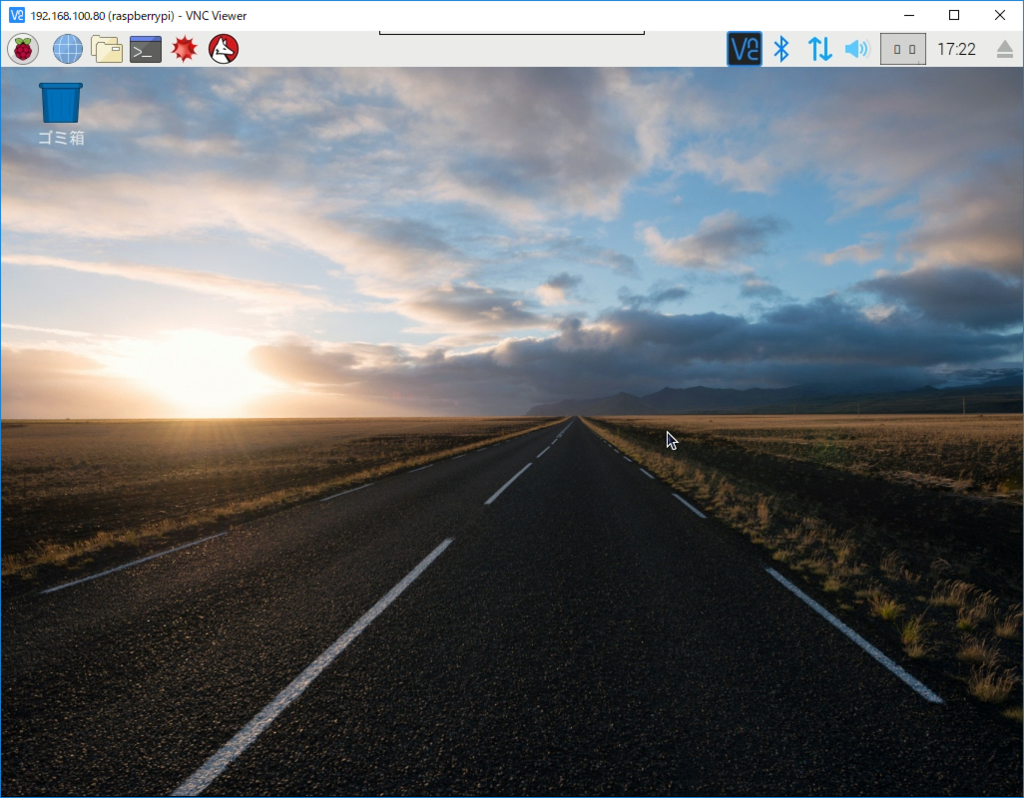
windows の vnc viewer で、IPを設定して接続すると、ログイン画面からちゃんと出てきました。
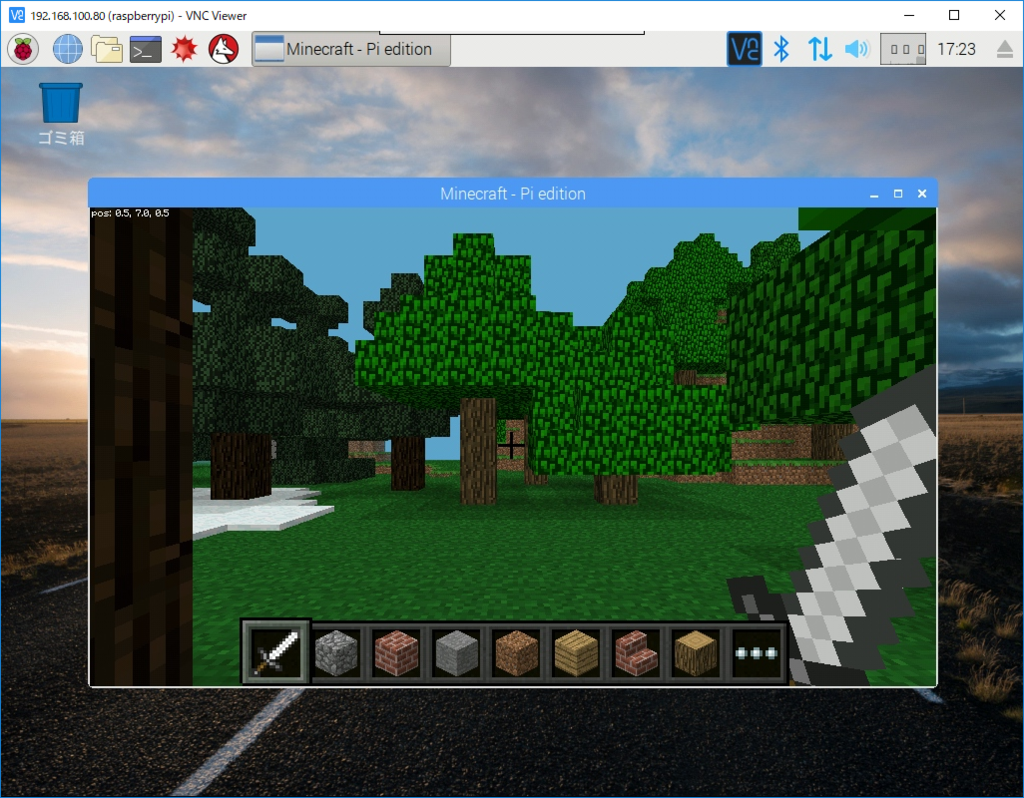
スクリーンショットを撮る
vnc viewer で、 Properties > Options > keys の Pass special keys directly to VNC Server を OFF にすれば、Print Screen のボタンが Windows サイドで動くみたいです。
FLiR Dev Kit を試す その1
FLiR Dev Kit を試します。
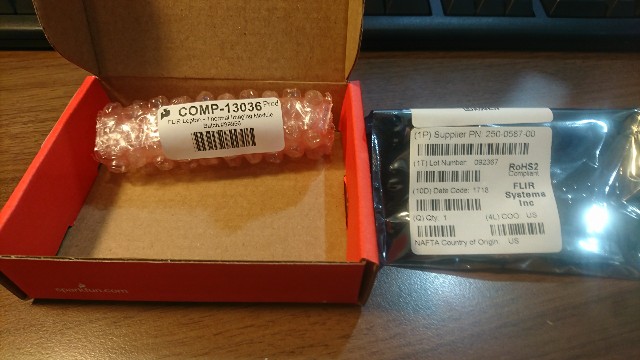
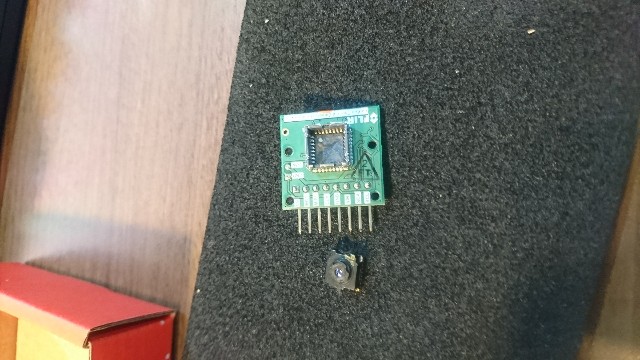
これなに?
FLiR とは、前方監視型赤外線(forward looking infra-red)の略称らしいです。
モノ
スイッチサイエンスから購入しました。
電源電圧: 3~5V
センサ形式: LWIR(8 ~ 14 μm)
画角: 水平視野51度、対角63.5度
解像度: 80 × 60
最小感度: 50mK
インターフェース(映像): MIPIもしくはSPI
インターフェース(制御): I2C
素早い応答性 (< 0.5 sec)
省電力: 通常150mW、最大160mW未満
メーカのガイド
FLIR Lepton Hookup Guide - learn.sparkfun.com
参考コード
GitHub - groupgets/LeptonModule: Code for getting started with the FLIR Lepton breakout board
斜め読みメモ
動作が不安定でも、モジュールの物理的な抜き差しはしない。
CSの接続先を 40PIN → 38PIN に変えればOKらしい。(未確認)
NFCリーダーライター PaSoRi を試す
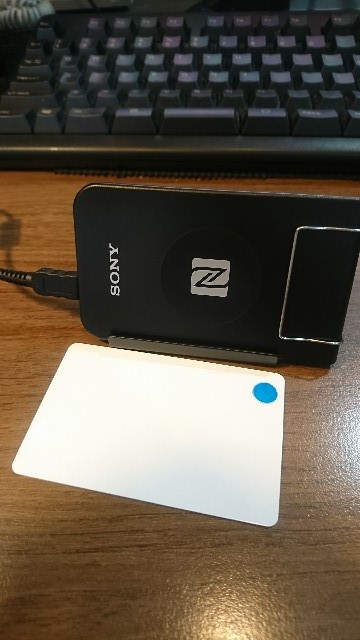
手元にあるのは RC-S370で、現在は生産が終了しているモデルですね。
認識
$ lsusb
Bus 001 Device 004: ID 041e:323d Creative Technology, Ltd
Bus 001 Device 005: ID 054c:02e1 Sony Corp. FeliCa S330 [PaSoRi]
Bus 001 Device 003: ID 0424:ec00 Standard Microsystems Corp. SMSC9512/9514 Fast Ethernet Adapter
Bus 001 Device 002: ID 0424:9514 Standard Microsystems Corp.
Bus 001 Device 001: ID 1d6b:0002 Linux Foundation 2.0 root hub
Sony Corp. FeliCa S330 [PaSoRi] と認識されています。
nfcpy
nfcpy を使います。
ドキュメントはこちら
Getting started — nfcpy 0.13.0 documentation
インストール
$ sudo pip install nfcpy

 ・・・

Successfully installed nfcpy ndeflib pydes libusb1
Cleaning up...
動作確認
$ python -m nfc
This is the 0.13.0 version of nfcpy run in Python 2.7.9
on Linux-4.9.28-v7+-armv7l-with-debian-8.0
I'm now searching your system for contactless devices
** found usb:054c:02e1 at usb:001:005 but access is denied
-- the device is owned by 'root' but you are 'kiyo'
-- also members of the 'root' group would be permitted
-- you could use 'sudo' but this is not recommended
-- better assign the device to the 'plugdev' group
   sudo sh -c 'echo SUBSYSTEM==\"usb\", ACTION==\"add\", ATTRS{idVendor}==\"054c\", ATTRS{idProduct}==\"02e1\", GROUP=\"plugdev\" >> /etc/udev/rules.d/nfcdev.rules'
   sudo udevadm control -R # then re-attach device
I'm not trying serial devices because you haven't told me
-- add the option '--search-tty' to have me looking
-- but beware that this may break other serial devs
Sorry, but I couldn't find any contactless device
指示が出ているので従う。
$ sudo sh -c 'echo SUBSYSTEM==\"usb\", ACTION==\"add\", ATTRS{idVendor}==\"054c\", ATTRS{idProduct}==\"02e1\", GROUP=\"plugdev\" >> /etc/udev/rules.d/nfcdev.rules'
$ sudo udevadm control -R
もう一度・・・
$ python -m nfc
This is the 0.13.0 version of nfcpy run in Python 2.7.9
on Linux-4.9.24-v7+-armv7l-with-debian-8.0
I'm now searching your system for contactless devices
I'm not trying serial devices because you haven't told me
-- add the option '--search-tty' to have me looking
-- but beware that this may break other serial devs
Sorry, but I couldn't find any contactless device
おや?
RC-S380/P でやりなおす
特に対応から外れているわけでも無いので、手元にあるPaSoRiが壊れていのかもしれない、、、ということで、新しい PaSoRi を買い直しました。
RC-S380/P を刺して、、、
This is the 0.13.0 version of nfcpy run in Python 2.7.9
on Linux-4.9.28-v7+-armv7l-with-debian-8.0
I'm now searching your system for contactless devices
** found SONY RC-S380/P NFC Port-100 v1.11 at usb:001:010
I'm not trying serial devices because you haven't told me
-- add the option '--search-tty' to have me looking
-- but beware that this may break other serial devs
よし。
やはり、手元の S370 は、古くて壊れていたのかな?
git のサンプルを動かす
スイカを乗せて・・・
$ git clone https://github.com/nfcpy/nfcpy.git
$ cd nfcpy
$ python examples/tagtool.py
[nfc.clf] searching for reader on path usb
[nfc.clf] using SONY RC-S380/P NFC Port-100 v1.11 at usb:001:010
** waiting for a tag **
Type3Tag 'FeliCa Standard (RC-S915)' ID=*** PMM=*** SYS=***
データを読み書きする
まず、メディア?を入手します。
アマゾンで買ったこれは、素直に動いてくれました。
先に書くと、フォーマットをして、NDEF 対応にしないと NDEF のやり取りが来ません。
NDEFフォーマットに成功したメディア達
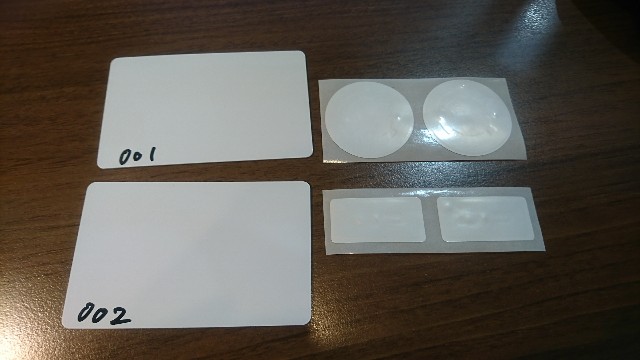
フォーマット
format.py
import nfc

def on_connect(tag):
        print("format:", tag.format())

clf = nfc.ContactlessFrontend('usb')
if clf:
        print("Clf: {}".format(clf))
        clf.connect(rdwr={
                'on-connect': on_connect
        })

clf.close()
実行
$ python format.py
Clf: SONY RC-S380/P on usb:001:010
('format:', True)
データの読み取り
messageに入っているデータを読み込みます。
フォーマットしただけだと、空っぽです。
import nfc

def on_startup(targets):
        print("on_startup()")
        return targets

def on_connect(tag):
        print("Tag: {}".format(tag))
        print("Tag type: {}".format(tag.type))
        #print '\n'.join(tag.dump())
        if tag.ndef:
                print tag.ndef.message.pretty()
        #return True

def on_release(tag):
        print("on_release()")
        if tag.ndef:
                print(tag.ndef.message.pretty())

clf = nfc.ContactlessFrontend('usb')
if clf:
        print("Clf: {}".format(clf))
        clf.connect(rdwr={
                'on-startup': on_startup,
                'on-connect': on_connect,
                'on-release': on_release
        })

clf.close()
実行
$ python 001.py
Clf: SONY RC-S380/P on usb:001:010
on_startup()
Tag: Type3Tag 'FeliCa Lite-S (RC-S966)' ID=_ID_ PMM=_PMM_ SYS=88B4
Tag type: Type3Tag
record 1
  type   = ''
  name   = ''
  data   = ''
書き込み
書き込んで、確認してみる。
import nfc

def on_startup(targets):
        print("on_startup()")
        return targets

def on_connect(tag):
        print("Tag: {}".format(tag))
        print("Tag type: {}".format(tag.type))
        #print '\n'.join(tag.dump())
        if tag.ndef:
                record = nfc.ndef.TextRecord("Hello World!")
                tag.ndef.message = nfc.ndef.Message(record)
                print tag.ndef.message.pretty()
        #return True

def on_release(tag):
        print("on_release()")
        if tag.ndef:
                print(tag.ndef.message.pretty())

clf = nfc.ContactlessFrontend('usb')
if clf:
        print("Clf: {}".format(clf))
        clf.connect(rdwr={
                'on-startup': on_startup,
                'on-connect': on_connect,
                'on-release': on_release
        })

clf.close()
実行
$ python 002.py
Clf: SONY RC-S380/P on usb:001:010
on_startup()
Tag: Type3Tag 'FeliCa Lite-S (RC-S966)' ID=__ID__ PMM=__PMM__ SYS=88B4
Tag type: Type3Tag
record 1
  type   = 'urn:nfc:wkt:T'
  name   = ''
  data   = '\x02enHello World!'
今回は、いつ買ったわからない RC-370 が動かなかったけれども、買い直した RC-S380/P では動いた点、
フォーマットしないと NDEF でのやり取りができない点でつまずきました!
Raspberry pi でロボットアームを動かす その8 別マシンから動画ストリームを使う
ロボットアームを制御している(直結してある)ラズパイ以外で、映像を取得したい。
どうやったら簡単に実現できるか。
Opencv 2.4.8 でやる
別のubuntu マシンの Python プログラムからロボットアームの映像を取得してみる。
まず、入っている opencv のバージョンを確認してみる。
$ python
Python 2.7.6 (default, Oct 26 2016, 20:30:19)
[GCC 4.8.4] on linux2
Type "help", "copyright", "credits" or "license" for more information.
>>> import cv2
>>> cv2.__version__
'2.4.8'
2.4.8 だ。
API を確認する。
Reading and Writing Images and Video — OpenCV 2.4.8.0 documentation
Python: cv2.VideoCapture() →
Parameters: filename – name of the opened video file (eg. video.avi) or image sequence (eg. img_%02d.jpg, which will read samples like img_00.jpg, img_01.jpg, img_02.jpg, …) device – id of the opened video capturing device (i.e. a camera index). If there is a single camera connected, just pass 0.
ということで、ダイレクトにURLを指定はでき無さそう。
ということで、2種類の書き方を探せた。
Opencv 2.4.8 ストリームで、終了記号を探す方法?
#!/usr/bin/env python
# -*- coding: UTF-8 -*-

import cv2
import urllib
import numpy as np

stream=urllib.urlopen('http://192.168.100.86:8080/?action=stream')
bytes=''
while True:
    bytes+=stream.read(16384)
    a = bytes.find('\xff\xd8')
    b = bytes.find('\xff\xd9')
    if a!=-1 and b!=-1:
        jpg = bytes[a:b+2]
        bytes= bytes[b+2:]
        i = cv2.imdecode(np.fromstring(jpg, dtype=np.uint8),cv2.CV_LOAD_IMAGE_COLOR)
        cv2.imshow('i',i)
        if cv2.waitKey(30) & 0xFF == ord('q'):
            exit(0)
Opencv 2.4.8 画像を取得し続ける方法
#!/usr/bin/env python
# -*- coding: UTF-8 -*-
import base64
import time
import urllib2

import cv2
import numpy as np

req = urllib2.Request('http://192.168.100.86:8080/?action=snapshot');
while True:
        response = urllib2.urlopen(req)
        img_array = np.asarray(bytearray(response.read()), dtype=np.uint8)
        frame = cv2.imdecode(img_array, 1)

        cv2.imshow('frame', frame)
        if cv2.waitKey(30) & 0xFF == ord('q'):
                break
opencv 3.2
APIがことなる。
OpenCV: cv::VideoCapture Class Reference
§ VideoCapture() [2/4]
cv::VideoCapture::VideoCapture  (   const String &  filename    )
Open video file or a capturing device or a IP video stream for video capturing.

This is an overloaded member function, provided for convenience. It differs from the above function only in what argument(s) it accepts. Same as VideoCapture(const String& filename, int apiPreference) but using default Capture API backends
とのことで、いかにも直接 URL を指定できそうだ。
※未確認※
Raspberry pi zero w を動かす
手元に Raspberry pi zero w が届いたので、OSを入れて動かしてみます。


OS
RASPBIAN JESSIE LITE の Release date:2017-03-02 を入れてみます。
SDformatter でフォーマットして、 lite を win32diskimager で焼きます。
初期設定
とりあえず、USBから有線LANを繋いで、rpi-update をインストールして、ファームウェアをアップデートして、再起動。
Wifi設定
上記記事に従う。
ifconfig から、 wlan0 が有ることを確認する。
wpa_passphrase コマンドで wifi 設定をする。
接続を確認できた。
日本語化
jfbterm は、ログアウトする際にフリーズする。
fbterm を入れる。
fbterm -s 20 など
補足
バンドルされていたマイクロSDに、Noobsが入っていたので、試しに起動した所、当初、 Wifiの設定等々が出てきませんでした。
そこで、rpi-update して、再起動したら、 Wifi の設定が出てきました。
USBシリアル通信を試す
何かの役に立つかもしれないから、シリアル通信に挑戦してみる。
Pi Zero をつかいました。
Raspberry pi の設定
raspi-config から、シリアルログインをONにします。
5 Interfacing Options > P6 Serial で、 ON にします。
配線
物理的につなぎます。
ケーブルその1
まず、手元に有ったこのケーブルで試しました。

赤5V、黒GND、緑Tx(3.3V)、白Rx(3.3V)
私の場合は、電源は別途供給していたので、 赤は繋がず、
| ケーブル | RPI |
|---|---|
| GND | GND |
| 緑Tx | UART_RXD |
| 白Rx | UART_TXD |
につなぎました。
PCにUSBをさして、teraTermで、COOM4指定して、、、
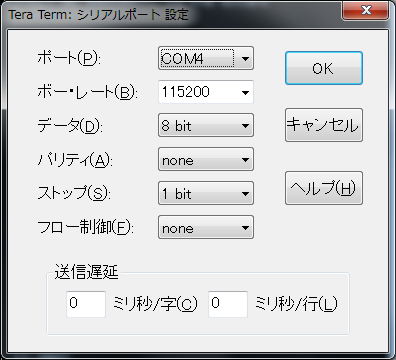
Rpi Boot…
文字化けする・・・
ケーブルその2
つぎに、同じく、いつかかったこれを使ってみた。
(多分これ・・・)
| アダプタ | RPI |
|---|---|
| GND | GND |
| Tx | UART_RXD |
| Rx | UART_TXD |


成功した!
圧力センサー FSR406 を試す
FSR406 と ADコンバーター MCP3008


配線
FSR406 が、圧力によって変化するタイプのスイッチ的な性格なので、プルダウン抵抗的な配線にする、、、のだと思います。
皆様の例に習いました。
抵抗が CH0(1) と Vdd(16) を繋いでいます。
MCP3008 Vdd(16), Vref(15) > RPI 3.3v
MCP3008 AGND(14),DGND(9)   > RPI GND

MCP3008 CLK(13)     > RPI GPIO 11 (SCLK)
MCP3008 DOUT(12)    > RPI GPIO 9 (MISO)
MCP3008 DIN(11)     > RPI GPIO 10 (MOSI)
MCP3008 CS/SHDN(10) > RPI GPIP 8 (CE0)

MCP3008 CH0(1) > RPI GPIP 8 (CE0)
に配線します。
コーディング
#!/usr/bin/env python
# -*- coding: utf-8 -*-

import time
import sys
import spidev

spi = spidev.SpiDev()
spi.open(0,0)

def readAdc(channel):
        adc = spi.xfer2([1,(8+channel)<<4,0])
        data = ((adc[1]&3) << 8) + adc[2]
        return data

def convertVolts(data):
        volts = (data * 3.3) / float(1023)
        volts = round(volts,4)
        return volts

def convertPressure(data):
        pressure = 1023 - data
        return pressure

if __name__ == '__main__':
        try:
                while True:
                        data = readAdc(0)
                        volts = convertVolts(data)
                        pressure        = convertPressure(data)
                        print("adc: {:4}, volts : {:.2f}, pressure : {:.2f}".format(data, volts, pressure))

                        time.sleep(1)

        except KeyboardInterrupt:
                pass

spi.close()
sys.exit(0)
接触を感知できれば何でも良かったので、面積の大きい FSR406 を購入したのですが、重さへの演算は、出来ないタイプのセンサーだと思う。
どのような仕組みで抵抗が変わるのか調べていませんが、分銅の置き方で数値が変わります。