ADRSEZCO Raspberry Pi用端子台出力基板
ADRSEZCO Raspberry Pi用端子台出力基板 | Bit Trade One, LTD


ADRSEZCO Raspberry Pi用端子台出力基板 を買ってみました。
テスト中だけど、抜けてもらいたくないことは多い。
Raspberry pi Zero で オフィス環境の可視化 その5 AM2322 に交換
AM2320 もすぐに停止するので、 AM2322 に交換してみる。

WiringPi アップデート
久しぶりにログインしたので、
$ sudo apt-get update
$ sudo apt-get upgrade
してみたら、WiringPi がエラーを出して動かなかった。 不用意なアップデートは、本当に危険。
Unable to determine hardware version. I see: Hardware : BCM2835
最新バージョンの WiringPi をコンパイルし直したところ、正常に動きました。
$ git clone git://git.drogon.net/wiringPi
$ cd wiringPi
$ ./build
配線

・・・の前に、 ピンは1.27ミリピッチです。 とのことなので、ブレッドボードにさせるように、ピッチ変換基板を利用します。
SOP8(1.27mm)DIP変換基板 金フラッシュ (9枚入): パーツ一般 秋月電子通商 電子部品 ネット通販


どうにかはんだ付けしましたが、汚い・・・。
足も切りすぎました。
pigpio をセットアップする
sudo apt-get install pigpio python-pigpio python3-pigpio
コーディング
こちらを使用しました。
rpi-location-monitor/AM2322.py at master · smartperson/rpi-location-monitor · GitHub
ただ、interface は 0 では無く、1 にしました。
$ ./AM2322.pigpio.py
20.6 66.6
20.7 66.5
20.7 66.5
20.7 66.5
20.7 66.5
20.7 66.5
20.7 66.5
今度は、止まらないと良いのですが、、、。
FLiR Dev Kit を試す その5
せっかくなので、ストリーミングしたい。
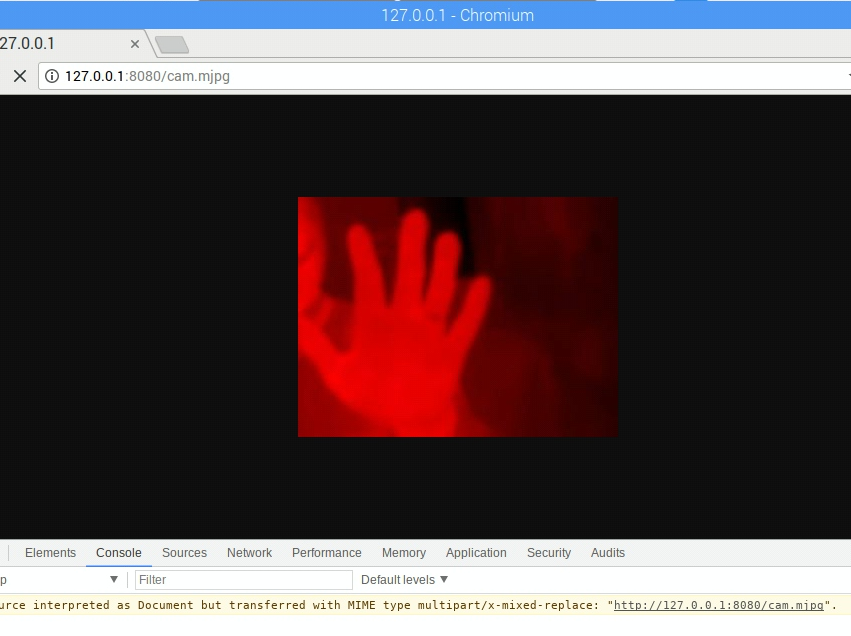
そこで、今までは Mjepg-streamer などを使ってきましたが、自分でゴリゴリいじるので、Python で実装しているサンプルを探したところ、有った!
Simple Python Motion Jpeg (mjpeg server) from webcam. Using: OpenCV,BaseHTTPServer · GitHub
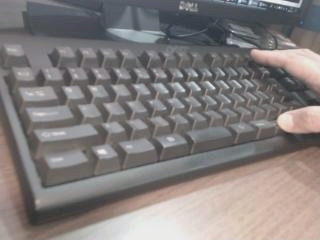
まずは、USBカメラなどをさして、ストリームのチェックを行う。
おっけー
Lepton 向けに改変する
これは、 Mr Igor のスクリプトを書き換えています。
Simple Python Motion Jpeg (mjpeg server) from webcam. Using: OpenCV,BaseHTTPServer · GitHub
これね。
#!/usr/bin/python
from pylepton import Lepton

import cv2
import numpy as np
from PIL import Image
import threading
from BaseHTTPServer import BaseHTTPRequestHandler,HTTPServer
from SocketServer import ThreadingMixIn
import StringIO
import time

class CamHandler(BaseHTTPRequestHandler):
        def do_GET(self):
                if self.path.endswith('.mjpg'):
                        self.send_response(200)
                        self.send_header('Content-type','multipart/x-mixed-replace; boundary=--jpgboundary')
                        self.end_headers()
                        try:
                                with Lepton() as l:
                                        while True:
                                                data_buffer, rc = l.capture()
                                                if not rc:
                                                        continue

                                                cv2.normalize(data_buffer, data_buffer, 0, 255, cv2.NORM_MINMAX)
                                                img = cv2.cvtColor(data_buffer, cv2.COLOR_GRAY2BGR)
                                                img[:, :, 0:2] = 0
                                                img = cv2.resize(img, (320,240))

                                                imgRGB=cv2.cvtColor(img,cv2.COLOR_BGR2RGB)
                                                jpg = Image.fromarray(np.uint8(np.asarray(imgRGB)))
                                                tmpFile = StringIO.StringIO()
                                                jpg.save(tmpFile,'JPEG')
                                                self.wfile.write("--jpgboundary")
                                                self.send_header('Content-type','image/jpeg')
                                                self.send_header('Content-length',str(tmpFile.len))
                                                self.end_headers()
                                                jpg.save(self.wfile,'JPEG')
                                                time.sleep(0.2)

                        except Exception as e:
                                print('Exception', e.args);
                                brak

                if self.path.endswith('.html'):
                        self.send_response(200)
                        self.send_header('Content-type','text/html')
                        self.end_headers()
                        self.wfile.write('<html><head></head><body>')
                        self.wfile.write('<img src="http://127.0.0.1:8080/cam.mjpg"/>')
                        self.wfile.write('</body></html>')
                        return


class ThreadedHTTPServer(ThreadingMixIn, HTTPServer):
        """Handle requests in a separate thread."""

def main():
        global img
        try:
                server = ThreadedHTTPServer(('localhost', 8080), CamHandler)
                print "server started"
                server.serve_forever()
        except KeyboardInterrupt:
                server.socket.close()

if __name__ == '__main__':
        main()
結果

TJBot
ケース
形状データをダウンロードできる。
とりあえず、プリントしてみよう。
3Dプリンター不調で頓挫・・・しましたが、調整し直してプリントしました。
 パーツ
パーツ
 組んで
組んで
 組んで
組んで
 こうなる
こうなる
スケルトンだと、ターミネーターみたいで、なんか怖い。
特に目が!
カメラ
カメラの向き
youtube を見る限り、そして、実際にはめ込んでみたぴったり感からして、どうやら上下逆向きに(ケーブルを上向きに)設置するようだ。
逆向きに刺そうとすると、どうしてもリボンケーブルのコネクタが鑑賞して刺さらないのだ。
なので、撮影の際などには、-vf, --vflip : Set vertical flip オプションを付ける。
カメラの動作確認
$ raspistill -w 480 -h 360 -n -vf -o mod.jpg

サーボモーター(腕)
とりあえず動かしてみよう。
以前書いたコードをそのまま使ってみた。
SG92.py
#!/usr/bin/python
# coding: utf-8

import RPi.GPIO as GPIO
import time
import signal
import sys

gp_out = 21

def exit_handler(signal, frame):
        print("\nExit")
        servo.ChangeDutyCycle(2.5)
        time.sleep(0.5)
        servo.stop()
        GPIO.cleanup()
        sys.exit(0)

signal.signal(signal.SIGINT, exit_handler)

GPIO.setmode(GPIO.BCM)


GPIO.setup(gp_out, GPIO.OUT)
# pwm = GPIO.PWM([チャンネル], [周波数(Hz)])
servo = GPIO.PWM(gp_out, 50)

servo.start(0.0)

val = [2.5,3.6875,4.875,6.0625,7.25,8.4375,9.625,10.8125,12]

servo.ChangeDutyCycle(val[0])
time.sleep(0.5)
servo.ChangeDutyCycle(val[8])
time.sleep(0.5)
servo.ChangeDutyCycle(val[0])
time.sleep(0.5)

while True:
        for i, dc in enumerate(val):
                servo.ChangeDutyCycle(dc)
                print("Angle:" + str(i*22.5)+"  dc = %.4f" % dc)
                time.sleep(0.5)
        for i, dc in enumerate( reversed(val) ):
                servo.ChangeDutyCycle(dc)
                print("Angle:" + str(180 - i*22.5)+"  dc = %.4f" % dc)
                time.sleep(0.5)
フルカラーLED
フルカラーLEDを触るのが今回が初めてです。
手元にあるのは カソードコモン のフルカラーLEDです。
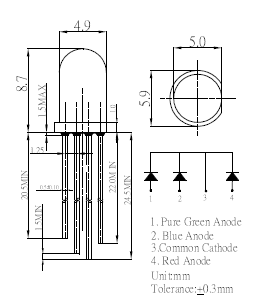
左から、緑、青、共通カソード、赤 ですね。
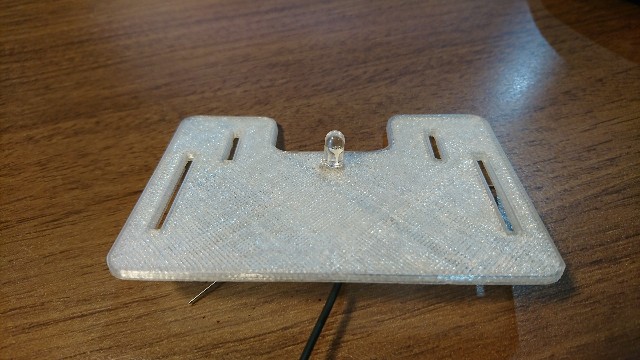
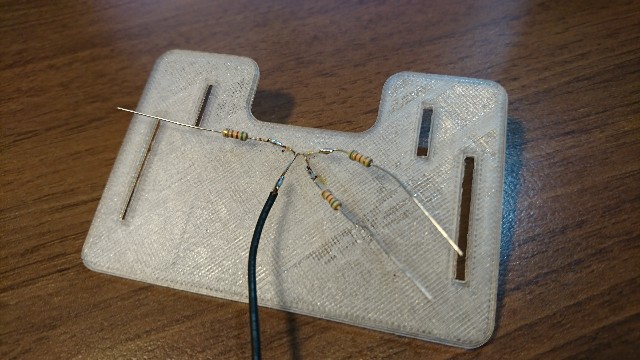
挿して、520Ωの抵抗を付けました。
グラデーションさせるテスト
https://making.mrlittlebig.com/raspberry-pi-2-フルカラーledをグラデーション-5e4916fda419
こちらのコードを、中断できるように改変させていただきました。
#!/usr/bin/python
# coding: utf-8
import RPi.GPIO as GPIO
import time
import signal
import sys

def exit_handler(signal, frame):
        print("\nExit")
        red.stop()
        green.stop()
        blue.stop()
        time.sleep(0.5)
        GPIO.cleanup()
        sys.exit(0)

signal.signal(signal.SIGINT, exit_handler)

Rpin = 13
Bpin = 19
Gpin = 26

GPIO.setmode(GPIO.BCM)
GPIO.setup(Rpin,GPIO.OUT)
GPIO.setup(Bpin,GPIO.OUT)
GPIO.setup(Gpin,GPIO.OUT)

red = GPIO.PWM(Rpin, 50)
green = GPIO.PWM(Gpin, 50)
blue = GPIO.PWM(Bpin, 50)

red.start(0)
green.start(0)
blue.start(0)

blue.ChangeDutyCycle(100)

COUNT = 100
T = 0.04
I = 0
time.sleep(0.5)
for _ in xrange(0, COUNT):
        red.ChangeDutyCycle(I)
        blue.ChangeDutyCycle(100 - I)
        time.sleep(T)
        I+=1
I = 0
for _ in xrange(0, COUNT):
        red.ChangeDutyCycle(100-I)
        green.ChangeDutyCycle(I)
        I+=1
        time.sleep(T)
I = 0
for _ in xrange(0, COUNT):
        green.ChangeDutyCycle(100 - I)
        blue.ChangeDutyCycle(I)
        I+=1
        time.sleep(T)

time.sleep(0.5)
red.stop()
green.stop()
blue.stop()

GPIO.cleanup()
拡散キャップをかぶせました。
マイク
$ lsusb

$ lsusb
Bus 001 Device 004: ID 8086:0808 Intel Corp.
Bus 001 Device 003: ID 0424:ec00 Standard Microsystems Corp. SMSC9512/9514 Fast Ethernet Adapter
Bus 001 Device 002: ID 0424:9514 Standard Microsystems Corp. SMC9514 Hub
Bus 001 Device 001: ID 1d6b:0002 Linux Foundation 2.0 root hub
Intel Corp とのだけ認識されているけど、大丈夫かな?
$ arecord -l
**** ハードウェアデバイス CAPTURE のリスト ****
カード 1: Device [USB PnP Sound Device], デバイス 0: USB Audio [USB Audio]
  サブデバイス: 1/1
  サブデバイス #0: subdevice #0
録音テスト
$ arecord -D plughw:1,0 -d 5 test.wav
録音中 WAVE 'test.wav' : Unsigned 8 bit, レート 8000 Hz, モノラル

kiyo@raspberrypi:~ $ aplay -D plughw:0,0 test.wav
再生中 WAVE 'test.wav' : Unsigned 8 bit, レート 8000 Hz, モノラル
なお、スピーカーが片方しかない状態(アナログout の2局のうち片方しか配線して居ない状態)なので、モノラルで進めています。
FLiR Dev Kit を試す その4
画像を表示するだけなら今のままでも良いのですが、温度の算出をしたいので、Output frame に触れましょう。
触れたあとに、加工して、最後には画像にしたい、、、ので、Python + Opencv がお手軽ではないかと思っていたところ、素敵なサンプルコードを発見しました。
Python から キャプチャするコード
GitHub - groupgets/pylepton: Quick and dirty pure python library for interfacing with FLIR lepton
サンプルコード
import numpy as np
import cv2
from pylepton import Lepton

with Lepton() as l:
  a,_ = l.capture()
cv2.normalize(a, a, 0, 65535, cv2.NORM_MINMAX) # extend contrast
np.right_shift(a, 8, a) # fit data into 8 bits
cv2.imwrite("output.jpg", np.uint8(a)) # write it!
Lepton() で何が手に入って、Lepton.capture() で何が返ってくるのかを見ましょう。
  def capture(self, data_buffer = None, log_time = False, debug_print = False, retry_reset = True):
    """Capture a frame of data.
    Captures 80x60 uint16 array of non-normalized (raw 12-bit) data. Returns that frame and a frame_id (which
    is currently just the sum of all pixels). The Lepton will return multiple, identical frames at a rate of up
    to ~27 Hz, with unique frames at only ~9 Hz, so the frame_id can help you from doing additional work
    processing duplicate frames.
    Args:
      data_buffer (numpy.ndarray): Optional. If specified, should be ``(60,80,1)`` with `dtype`=``numpy.uint16``.
    Returns:
      tuple consisting of (data_buffer, frame_id)
    """
読みやすく改変
001.py
#!/usr/bin/env python
# -*- coding: utf-8 -*
import sys
import copy
import numpy as np
import cv2
from pylepton import Lepton

def main():
        with Lepton() as l:
                data_buffer, frame_id = l.capture()

        print("---data_buffer---")
        print(data_buffer[59:, 75:])
        print(data_buffer.shape)
        print(type(data_buffer))
        data_1d = data_buffer.ravel()
        print( 'MAX:%d, MIN:%d' % (np.max(data_1d), np.min(data_1d) ))

        # 変数のコピー
        data_8bit       = copy.deepcopy(data_buffer)
        data_normalized = copy.deepcopy(data_buffer)

        # data_normalized を正規化
        cv2.normalize(data_buffer, data_normalized, 0, 65535, cv2.NORM_MINMAX) # extend contrast
        # fit to 8 bit
        np.right_shift(data_8bit, 8, data_8bit)
        np.right_shift(data_normalized, 8, data_normalized)

        print("----data_8bit----")
        print(data_8bit[59:, 75:])
        print(data_8bit.shape)
        data_1d = data_8bit.ravel()
        print( 'MAX:%d, MIN:%d' % (np.max(data_1d), np.min(data_1d) ))

        print("---data_normalized---")
        print(data_normalized[59:, 75:])
        print(data_normalized.shape)
        data_1d = data_normalized.ravel()
        print( 'MAX:%d, MIN:%d' % (np.max(data_1d), np.min(data_1d) ))

        image_original  = np.uint8(data_8bit)
        image_gray              = np.uint8(data_normalized)
        image_rgb               = cv2.cvtColor(image_gray, cv2.COLOR_GRAY2BGR)
        image_org_rgb   = cv2.cvtColor(image_original, cv2.COLOR_GRAY2BGR)

        image_rgb[:, :, 0:2] = 0
        image_org_rgb[:, :, 0:2] = 0

        print("---image_rgb---")
        print(image_rgb[59:, 75:])
        print(image_rgb.shape)

        print("---image_org_rgb---")
        print(image_org_rgb[59:, 75:])
        print(image_org_rgb.shape)

        # リサイズ
        image_original  = cv2.resize(image_original, None, fx=4, fy=4)
        image_gray              = cv2.resize(image_gray, None, fx=4, fy=4)
        image_rgb               = cv2.resize(image_rgb, None, fx=4, fy=4)
        image_org_rgb   = cv2.resize(image_org_rgb, None, fx=4, fy=4)

        cv2.imshow("Leption original", image_original)
        cv2.imshow("Leption normalize", image_gray)
        cv2.imshow("Leption RGB", image_rgb)
        cv2.imshow("Leption org RGB", image_org_rgb)

        cv2.waitKey(0)
        cv2.destroyAllWindows()

if __name__ == '__main__':
        main()
やってみる。
$ ./001.py
---data_buffer---
[[[7915]
  [7916]
  [7919]
  [7908]
  [7904]]]
(60, 80, 1)
<type 'numpy.ndarray'>
MAX:8327, MIN:7671
----data_8bit----
[[[30]
  [30]
  [30]
  [30]
  [30]]]
(60, 80, 1)
MAX:32, MIN:29
---data_normalized---
[[[95]
  [95]
  [96]
  [92]
  [90]]]
(60, 80, 1)
MAX:255, MIN:0
---image_rgb---
[[[ 0  0 95]
  [ 0  0 95]
  [ 0  0 96]
  [ 0  0 92]
  [ 0  0 90]]]
(60, 80, 3)
---image_org_rgb---
[[[ 0  0 30]
  [ 0  0 30]
  [ 0  0 30]
  [ 0  0 30]
  [ 0  0 30]]]
(60, 80, 3)


たとえば、 output frame は 7904 でした。
0.026 * ( 7903 - 8192 ) + カメラの温度 = -7.488度 + カメラの温度
ってことかな?
正規化しないと、最小値が29で、最大値が32 なので、画像とはなりえない。ほぼ一色。
どこかのフォーラムにも書いてあったけど、範囲を決めて(摂氏 -20 ~ +100度など?)、その範囲外は 0 と 255 とみなして、120度の中範囲で 255 を使用したほうが良いかもしれない。
-20度 と +100度 における正規化 かな?
そうすれば、画像として見られたものに成って、かつ、出番の多そうな温度も拾える、、、かな?
やってみないとわからない。
-10度 +80度 を入れてみる
やってみた
強引ですが、output buffer を書き換えて、常に -10 と +80 が登場するようにして、それを 0~255 で正規化してみました。
左上の白と右上の黒が、それです。
#!/usr/bin/env python
# -*- coding: utf-8 -*
import sys
import copy
import numpy as np
import cv2
from pylepton import Lepton

def main():
        with Lepton() as l:
                data_buffer, frame_id = l.capture()

        print("---data_buffer---")
        print(data_buffer[59:, 75:])
        print(data_buffer.shape)
        print(type(data_buffer))
        data_1d = data_buffer.ravel()
        print( 'MAX:%d, MIN:%d' % (np.max(data_1d), np.min(data_1d) ))

        # 変数のコピー
        data_8bit       = copy.deepcopy(data_buffer)
        data_normalized = copy.deepcopy(data_buffer)

        # -10 +80 で上書き:基準値は 8192
        data_8bit[0,0,0]        = 7807 # -10度
        data_8bit[59,79,0]      = 11268 # +80度

        # 正規化
        cv2.normalize(data_8bit, data_8bit, 0, 255, cv2.NORM_MINMAX) # extend contrast
        cv2.normalize(data_normalized, data_normalized, 0, 255, cv2.NORM_MINMAX) # extend contrast

        print("----data_8bit----")
        print(data_8bit[59:, 75:])
        print(data_8bit.shape)
        data_1d = data_8bit.ravel()
        print( 'MAX:%d, MIN:%d' % (np.max(data_1d), np.min(data_1d) ))

        print("---data_normalized---")
        print(data_normalized[59:, 75:])
        print(data_normalized.shape)
        data_1d = data_normalized.ravel()
        print( 'MAX:%d, MIN:%d' % (np.max(data_1d), np.min(data_1d) ))

        image_original  = np.uint8(data_8bit)
        image_gray              = np.uint8(data_normalized)
        image_bgr               = cv2.cvtColor(image_gray, cv2.COLOR_GRAY2BGR)
        image_org_bgr   = cv2.cvtColor(image_original, cv2.COLOR_GRAY2BGR)

        image_bgr[:, :, 0:2] = 0
        image_org_bgr[:, :, 0:2] = 0

        print("---image_bgr---")
        print(image_bgr[59:, 75:])
        print(image_bgr.shape)

        print("---image_org_bgr---")
        print(image_org_bgr[59:, 75:])
        print(image_org_bgr.shape)

        # リサイズ
        image_original  = cv2.resize(image_original, None, fx=4, fy=4)
        image_gray              = cv2.resize(image_gray, None, fx=4, fy=4)
        image_bgr               = cv2.resize(image_bgr, None, fx=4, fy=4)
        image_org_bgr   = cv2.resize(image_org_bgr, None, fx=4, fy=4)

        cv2.imshow("Leption original", image_original)
        cv2.imshow("Leption normalize", image_gray)
        cv2.imshow("Leption RGB", image_bgr)
        cv2.imshow("Leption org RGB", image_org_bgr)
        # 保存
        cv2.imwrite("001.image_original.png", image_original)
        cv2.imwrite("001.image_gray.png", image_gray)
        cv2.imwrite("001.image_bgr.png", image_bgr)
        cv2.imwrite("001.image_org_bgr.png", image_org_bgr)

        cv2.waitKey(0)
        cv2.destroyAllWindows()

if __name__ == '__main__':
        main()
最初から 255 で正規化しました。


この2つの画像では、真っ赤(右下)なら、カメラより+80度高く、真っ黒(左上)なら、カメラより10度低い事になります。
映像としては、面白みが無い。
熱湯が入ったカップを持って、撮影してみました。
室温は20度なので、おそらくカメラも20度前後。
お湯は電気ポットから出したばかりです。


Output buffer の最大値は 9664 だった。おそらくこれはコップ。
0.026 * (9664 - 8192) = 38.272
室温の20を足すと、 だいたい60度?
こうなってきたら、もうちょっと正確に温度を用意して、キャリブレーション(傾きを算出)してみたくもなる。
でも、正確に温度のわかっている物体って、どこにあるのだろか。
修正
cv2.COLOR_GRAY2RGB を指定しても、出力が BGR に成っていたので、 cv2.COLOR_GRAY2BGR に直しました。
FLiR Dev Kit を試す その3
FLiR Dev Kit を試す その3
まず、メモを残します。
I2C でセンサーから温度を取得する。
LEP_GetSysFpaTemperatureKelvin の返り値が何なのかわからない・・・。
FPA Temp In Kelvin x 100 とあるので、カメラの温度(Kelvin)の100倍の値っぽいのだが、、、。
FFC
フラットフィールド補正モード とは、なんぞや・・・
lepton3 の 国内販売
Lepton, Lepton 3.0, FLIR | コーンズ テクノロジーオンラインショップ
FAQ も有って、全くの無知なので、読むだけで何かしら得られる。
データシートいわく
データシートいわく、4種の温度に関係した数字がありそうだ。
4.5.5 SYS AUX Temperature Kelvin
This command returns the Lepton Camera’s AUX Temperature in Kelvin. This value is from a thermistor located on the Lepton housing.

LEP_RESULT LEP_GetSysAuxTemperatureKelvin(LEP_CAMERA_PORT_DESC_T_PTR portDescPtr, LEP_SYS_AUX_TEMPERATURE_KELVIN_T_PTR auxTemperaturePtr);

4.5.6 SYS FPA Temperature Kelvin
This command returns the Lepton Camera’s FPA Temperature in Kelvin.

LEP_RESULT LEP_GetSysFpaTemperatureKelvin(LEP_CAMERA_PORT_DESC_T_PTR portDescPtr, LEP_SYS_FPA_TEMPERATURE_KELVIN_T_PTR fpaTemperaturePtr)
そもそも、FPA とは、なんだろうか?
フォーカルプレーンアレイ (Focal Plane Arrays; FPA)
SDK の DOC いわく
カメラ内部温度
internal temperature of the camera. という表現が出て来る。
カメラ内部の温度かな?
そして、The output frame for the internal temperature is 8192 とある。
カメラの内部温度 = 8192 なので、2の13乗 ですね。
output frame 0 = 0 kelvin なら話は早いんだけど、どうやらそうではなさそう?原点は通らないのかな。
最高温度と最低温度
Lepton Thread.h をよめば、取得方法がわかるよ! とか書いてある。
・・・単純に全てのフレームバッファの最小値・最大値を保存してた。それだけだった。
value = frameBuffer[i];
if(value > maxValue) {
    maxValue = value;
}
if(value < minValue) {
    minValue = value;
}
そして、画像のために、最小値:0 ~ 最大値:255 で、正規化している。
RGG とかにしやすいからかな。
rawデータを取得すると、 pgm フォーマットで、数字がダイレクトに入っている。
MAX Output frame = 最高温度
MIN Output frame = 最低温度
温度の算出
1.センサー自体の温度が手に入り、その温度の Frame を 8192 とする。
2.Experimental な温度と、Frame を手に入れる。
3.その2点で、線形回帰する
のかな?
その、角度ですが、0.0217 だとか、0.026 だとか書いている人がいる。
大体そうだとしたら、
温度 = 0.026 * ( OutputFrame - 8192 ) + カメラの温度
になるのかな???
とあるピクセルの OutputFrame 20000 だとしたら、
0.026 * ( 20000 - 8192 ) + カメラの温度 = 307 度 + カメラの温度 かな。
画像のために正規化する前の 生の OutputFrame を見てみないとわからない。
