FLiR Dev Kit を試す その4
画像を表示するだけなら今のままでも良いのですが、温度の算出をしたいので、Output frame に触れましょう。
触れたあとに、加工して、最後には画像にしたい、、、ので、Python + Opencv がお手軽ではないかと思っていたところ、素敵なサンプルコードを発見しました。
Python から キャプチャするコード
GitHub - groupgets/pylepton: Quick and dirty pure python library for interfacing with FLIR lepton
サンプルコード
import numpy as np
import cv2
from pylepton import Lepton

with Lepton() as l:
  a,_ = l.capture()
cv2.normalize(a, a, 0, 65535, cv2.NORM_MINMAX) # extend contrast
np.right_shift(a, 8, a) # fit data into 8 bits
cv2.imwrite("output.jpg", np.uint8(a)) # write it!
Lepton() で何が手に入って、Lepton.capture() で何が返ってくるのかを見ましょう。
  def capture(self, data_buffer = None, log_time = False, debug_print = False, retry_reset = True):
    """Capture a frame of data.
    Captures 80x60 uint16 array of non-normalized (raw 12-bit) data. Returns that frame and a frame_id (which
    is currently just the sum of all pixels). The Lepton will return multiple, identical frames at a rate of up
    to ~27 Hz, with unique frames at only ~9 Hz, so the frame_id can help you from doing additional work
    processing duplicate frames.
    Args:
      data_buffer (numpy.ndarray): Optional. If specified, should be ``(60,80,1)`` with `dtype`=``numpy.uint16``.
    Returns:
      tuple consisting of (data_buffer, frame_id)
    """
読みやすく改変
001.py
#!/usr/bin/env python
# -*- coding: utf-8 -*
import sys
import copy
import numpy as np
import cv2
from pylepton import Lepton

def main():
        with Lepton() as l:
                data_buffer, frame_id = l.capture()

        print("---data_buffer---")
        print(data_buffer[59:, 75:])
        print(data_buffer.shape)
        print(type(data_buffer))
        data_1d = data_buffer.ravel()
        print( 'MAX:%d, MIN:%d' % (np.max(data_1d), np.min(data_1d) ))

        # 変数のコピー
        data_8bit       = copy.deepcopy(data_buffer)
        data_normalized = copy.deepcopy(data_buffer)

        # data_normalized を正規化
        cv2.normalize(data_buffer, data_normalized, 0, 65535, cv2.NORM_MINMAX) # extend contrast
        # fit to 8 bit
        np.right_shift(data_8bit, 8, data_8bit)
        np.right_shift(data_normalized, 8, data_normalized)

        print("----data_8bit----")
        print(data_8bit[59:, 75:])
        print(data_8bit.shape)
        data_1d = data_8bit.ravel()
        print( 'MAX:%d, MIN:%d' % (np.max(data_1d), np.min(data_1d) ))

        print("---data_normalized---")
        print(data_normalized[59:, 75:])
        print(data_normalized.shape)
        data_1d = data_normalized.ravel()
        print( 'MAX:%d, MIN:%d' % (np.max(data_1d), np.min(data_1d) ))

        image_original  = np.uint8(data_8bit)
        image_gray              = np.uint8(data_normalized)
        image_rgb               = cv2.cvtColor(image_gray, cv2.COLOR_GRAY2BGR)
        image_org_rgb   = cv2.cvtColor(image_original, cv2.COLOR_GRAY2BGR)

        image_rgb[:, :, 0:2] = 0
        image_org_rgb[:, :, 0:2] = 0

        print("---image_rgb---")
        print(image_rgb[59:, 75:])
        print(image_rgb.shape)

        print("---image_org_rgb---")
        print(image_org_rgb[59:, 75:])
        print(image_org_rgb.shape)

        # リサイズ
        image_original  = cv2.resize(image_original, None, fx=4, fy=4)
        image_gray              = cv2.resize(image_gray, None, fx=4, fy=4)
        image_rgb               = cv2.resize(image_rgb, None, fx=4, fy=4)
        image_org_rgb   = cv2.resize(image_org_rgb, None, fx=4, fy=4)

        cv2.imshow("Leption original", image_original)
        cv2.imshow("Leption normalize", image_gray)
        cv2.imshow("Leption RGB", image_rgb)
        cv2.imshow("Leption org RGB", image_org_rgb)

        cv2.waitKey(0)
        cv2.destroyAllWindows()

if __name__ == '__main__':
        main()
やってみる。
$ ./001.py
---data_buffer---
[[[7915]
  [7916]
  [7919]
  [7908]
  [7904]]]
(60, 80, 1)
<type 'numpy.ndarray'>
MAX:8327, MIN:7671
----data_8bit----
[[[30]
  [30]
  [30]
  [30]
  [30]]]
(60, 80, 1)
MAX:32, MIN:29
---data_normalized---
[[[95]
  [95]
  [96]
  [92]
  [90]]]
(60, 80, 1)
MAX:255, MIN:0
---image_rgb---
[[[ 0  0 95]
  [ 0  0 95]
  [ 0  0 96]
  [ 0  0 92]
  [ 0  0 90]]]
(60, 80, 3)
---image_org_rgb---
[[[ 0  0 30]
  [ 0  0 30]
  [ 0  0 30]
  [ 0  0 30]
  [ 0  0 30]]]
(60, 80, 3)


たとえば、 output frame は 7904 でした。
0.026 * ( 7903 - 8192 ) + カメラの温度 = -7.488度 + カメラの温度
ってことかな?
正規化しないと、最小値が29で、最大値が32 なので、画像とはなりえない。ほぼ一色。
どこかのフォーラムにも書いてあったけど、範囲を決めて(摂氏 -20 ~ +100度など?)、その範囲外は 0 と 255 とみなして、120度の中範囲で 255 を使用したほうが良いかもしれない。
-20度 と +100度 における正規化 かな?
そうすれば、画像として見られたものに成って、かつ、出番の多そうな温度も拾える、、、かな?
やってみないとわからない。
-10度 +80度 を入れてみる
やってみた
強引ですが、output buffer を書き換えて、常に -10 と +80 が登場するようにして、それを 0~255 で正規化してみました。
左上の白と右上の黒が、それです。
#!/usr/bin/env python
# -*- coding: utf-8 -*
import sys
import copy
import numpy as np
import cv2
from pylepton import Lepton

def main():
        with Lepton() as l:
                data_buffer, frame_id = l.capture()

        print("---data_buffer---")
        print(data_buffer[59:, 75:])
        print(data_buffer.shape)
        print(type(data_buffer))
        data_1d = data_buffer.ravel()
        print( 'MAX:%d, MIN:%d' % (np.max(data_1d), np.min(data_1d) ))

        # 変数のコピー
        data_8bit       = copy.deepcopy(data_buffer)
        data_normalized = copy.deepcopy(data_buffer)

        # -10 +80 で上書き:基準値は 8192
        data_8bit[0,0,0]        = 7807 # -10度
        data_8bit[59,79,0]      = 11268 # +80度

        # 正規化
        cv2.normalize(data_8bit, data_8bit, 0, 255, cv2.NORM_MINMAX) # extend contrast
        cv2.normalize(data_normalized, data_normalized, 0, 255, cv2.NORM_MINMAX) # extend contrast

        print("----data_8bit----")
        print(data_8bit[59:, 75:])
        print(data_8bit.shape)
        data_1d = data_8bit.ravel()
        print( 'MAX:%d, MIN:%d' % (np.max(data_1d), np.min(data_1d) ))

        print("---data_normalized---")
        print(data_normalized[59:, 75:])
        print(data_normalized.shape)
        data_1d = data_normalized.ravel()
        print( 'MAX:%d, MIN:%d' % (np.max(data_1d), np.min(data_1d) ))

        image_original  = np.uint8(data_8bit)
        image_gray              = np.uint8(data_normalized)
        image_bgr               = cv2.cvtColor(image_gray, cv2.COLOR_GRAY2BGR)
        image_org_bgr   = cv2.cvtColor(image_original, cv2.COLOR_GRAY2BGR)

        image_bgr[:, :, 0:2] = 0
        image_org_bgr[:, :, 0:2] = 0

        print("---image_bgr---")
        print(image_bgr[59:, 75:])
        print(image_bgr.shape)

        print("---image_org_bgr---")
        print(image_org_bgr[59:, 75:])
        print(image_org_bgr.shape)

        # リサイズ
        image_original  = cv2.resize(image_original, None, fx=4, fy=4)
        image_gray              = cv2.resize(image_gray, None, fx=4, fy=4)
        image_bgr               = cv2.resize(image_bgr, None, fx=4, fy=4)
        image_org_bgr   = cv2.resize(image_org_bgr, None, fx=4, fy=4)

        cv2.imshow("Leption original", image_original)
        cv2.imshow("Leption normalize", image_gray)
        cv2.imshow("Leption RGB", image_bgr)
        cv2.imshow("Leption org RGB", image_org_bgr)
        # 保存
        cv2.imwrite("001.image_original.png", image_original)
        cv2.imwrite("001.image_gray.png", image_gray)
        cv2.imwrite("001.image_bgr.png", image_bgr)
        cv2.imwrite("001.image_org_bgr.png", image_org_bgr)

        cv2.waitKey(0)
        cv2.destroyAllWindows()

if __name__ == '__main__':
        main()
最初から 255 で正規化しました。


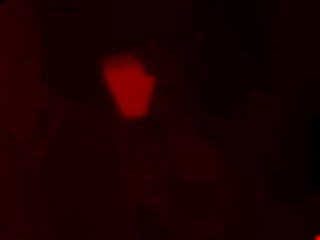
この2つの画像では、真っ赤(右下)なら、カメラより+80度高く、真っ黒(左上)なら、カメラより10度低い事になります。
映像としては、面白みが無い。
熱湯が入ったカップを持って、撮影してみました。
室温は20度なので、おそらくカメラも20度前後。
お湯は電気ポットから出したばかりです。


Output buffer の最大値は 9664 だった。おそらくこれはコップ。
0.026 * (9664 - 8192) = 38.272
室温の20を足すと、 だいたい60度?
こうなってきたら、もうちょっと正確に温度を用意して、キャリブレーション(傾きを算出)してみたくもなる。
でも、正確に温度のわかっている物体って、どこにあるのだろか。
修正
cv2.COLOR_GRAY2RGB を指定しても、出力が BGR に成っていたので、 cv2.COLOR_GRAY2BGR に直しました。