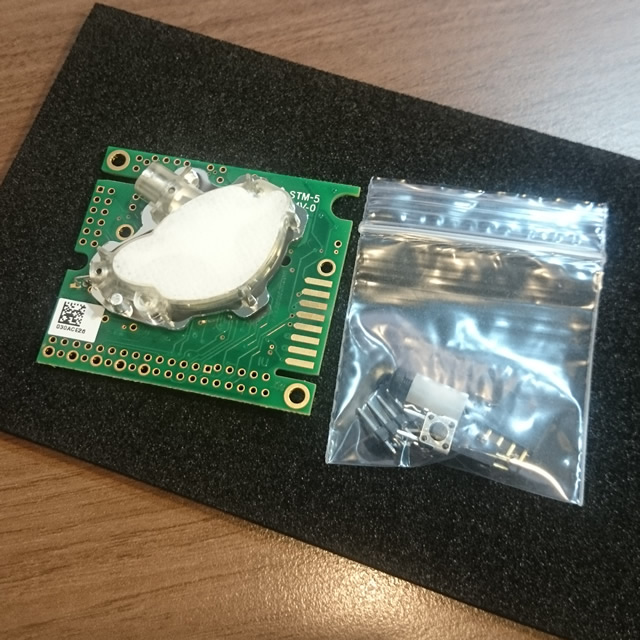
二酸化炭素センサー K30 CO2 Sensor SENSEAIR を試す
K30 CO2 Sensor SENSEAIR

https://www.tindie.com/pMG811roducts/AlfredC/senseair-k30-co2-sensor/www.tindie.com

K30 CO2 self-calibrating sensor
Operating Principle Non-dispersive infrared (NDIR)
Measured gas Carbon dioxide (CO2)
Measurement range CO2 0 to 5000 ppm / 0 to 3%vol
Accuracy ±30 ppm ±3% of reading
Dimensions 57 mm x 51 mm x 14 mm
Maintenance Maintenance-free*
Life Expectancy > 15 years
Operation temperature range 0 to 50 °C
Operation humidity range 0 to 95% RH (non-condensing)
Power supply 4.5 to 14.0 V DC
Response time(T1/e) 20 sec diffusion time
先に I2C で試して失敗し、UART で通信に成功しています。
また、RPI3とRPI2では、UARTの仕様が異なります。
RPI2のUARTで動作確認を取りましたので注意して下さい。
I2C で挑戦
配線
http://co2meters.com/Documentation/AppNotes/AN142-RaspberryPi-K_series.pdf

こちらに従う。
新しいバージョンが有ったので、一部書き換えました。
$ sudo apt-get update
$ sudo apt-get install python-dev
$ mkdir notsmb
$ cd notsmb
$ wget http://www.byvac.com/downloads/sws/notsmb_1_3.zip
$ unzip notsmb_1_0.zip
$ sudo python setup.py install
データ取得テスト
 $ sudo i2cdetect -y 1
     0  1  2  3  4  5  6  7  8  9  a  b  c  d  e  f
00:          -- -- -- -- -- -- -- -- -- -- -- -- --
10: -- -- -- -- -- -- -- -- -- -- -- -- -- -- -- --
20: -- -- -- -- -- -- -- -- -- -- -- -- -- -- -- --
30: -- -- -- -- -- -- -- -- -- -- -- -- -- -- -- --
40: -- -- -- -- -- -- -- -- -- -- -- -- -- -- -- --
50: -- -- -- -- -- -- -- -- -- -- -- -- -- -- -- --
60: -- -- -- -- -- -- -- -- 68 69 -- -- -- -- -- --
70: -- -- -- -- -- -- -- --
認識している。
$ sudo i2cdump -y 1 0x68 w
     0,8  1,9  2,a  3,b  4,c  5,d  6,e  7,f
00: XXXX XXXX XXXX XXXX XXXX XXXX XXXX XXXX
08: XXXX XXXX XXXX XXXX XXXX XXXX XXXX XXXX
10: XXXX XXXX XXXX XXXX XXXX XXXX XXXX XXXX
18: XXXX XXXX XXXX XXXX XXXX XXXX XXXX XXXX
20: XXXX XXXX XXXX XXXX XXXX XXXX XXXX XXXX
28: XXXX XXXX XXXX XXXX XXXX XXXX XXXX XXXX
30: XXXX XXXX XXXX XXXX XXXX XXXX XXXX XXXX
...
壊したかな・・・。
コーディング
LiV/co2Sensor.py at master · FirstCypress/LiV · GitHub
サンプル
#!/usr/bin/env python
import time
from notsmb import notSMB

I2CBUS = 1
CO2_ADDR = 0x68
READ = 0x22
readBytes = [0x00, 0x08, 0x2A]
bus = notSMB(I2CBUS)

while True:
        try:
                resp = bus.i2c(CO2_ADDR,[0x22,0x00,0x08,0x2A],4)
                time.sleep(0.1)
                #resp = bus.i2c(CO2_ADDR,[],4)
                co2Val = (resp[1]*256) + resp[2]
                print(resp)
                print(co2Val);
                break

        except:
                blank =0;
データ取得できず。
データシートには
Pull‐up of SDA and SCL lines to 3.3V
と有る。
4.7kΩのPull-pu抵抗を入れろ!
との書き込みをフォーラムで見たりもした。
ラズパイのGPIO2,3に入っている 1.8kΩの抵抗では小さすぎるのではないか?
調査継続。
UART に挑戦
配線

K30 の TxD が Rpi2 の RxD に刺さり、
K30 の RxD が Rpi2 の TxD に刺さるように配線します。
デフォルの ttyAMA0 の使用を止める
理解できていないので、初期設定で使われているサービスを止める、、、とだけ、理解しています。
$ sudo systemctl stop serial-getty@ttyAMA0.service
コーディング
の、AN137 - Raspberry Pi UART Communication Instructions for COZIR & SenseAir K30 Sensors (ZIP) に、サンプルコードが入っている。
#!/usr/bin/env python
# -*- coding: utf-8 -*-

#Python app to run a K-30 Sensor
import serial
import time
ser = serial.Serial("/dev/ttyAMA0")
print "Serial Connected!"
ser.flushInput()
time.sleep(1)

while True:
        ser.write("\xFE\x44\x00\x08\x02\x9F\x25")
        time.sleep(.01)
        resp = ser.read(7)
        high = ord(resp[3])
        low = ord(resp[4])
        co2 = (high*256) + low
        print ""
        print ""
        print "Co2 = " + str(co2)
        time.sleep(1)
$ sudo ./co2.K30.uart.py
Serial Connected!


Co2 = 877


Co2 = 878
^CTraceback (most recent call last):
  File "./co2.K30.uart.py", line 22, in <module>
    time.sleep(1)
KeyboardInterrupt
取得できました。